How to Design a List Using Swiftui
SwiftUI has its own radio button implementation using Pickers that come with few default designs, such as .pickerStyle(.segmented) or .pickerStyle(.wheel). Pickers can be useful for implementing filtering functionality but what if you want custom design and behavior, for example YouTube-like design and behavior?
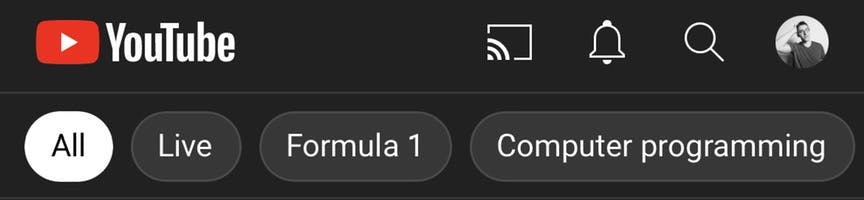
YouTube-like filtering uses horizontally scrollable view where buttons are placed, each with its own state, and selected button has different color to the others.
Requirements
Before implementing custom YouTube-like filtering, let's define a few requirements that custom view needs to meet:
-
view needs to mimic YouTube-like filtering
-
view needs to use enumerations
-
view needs to be generic
-
view needs to be stateless
State handling
For handling state, custom filter view will use Swift Enumerations. Enumerations in Swift are quite powerful and are an ideal way to filter data displayed on view once each enum case is selected. Custom filter view will also require that enum conforms to a few protocols, such as String, CaseIterable and Identifiable.
Let's imagine that the application is showing a list of cars available for purchase, and you would like to filter them based on type. In such a case you would create CarType enum to define the type of each car in the list.
CarType:
enum CarType: String, CaseIterable, Identifiable { var id: String { self.rawValue } case all, family, city, luxury, supercar } Explanation of why each protocol is needed:
-
String- we want each enum case to have its raw value represented as string, needed forTextview in SwiftUI -
CaseIterable- by conforming to this protocol, you can access a collection of all the type's cases by using the type's allCases property, needed forForEachloop in SwiftUI -
Identifiable- to provide unique id to each enum state, needed forForEachloop in SwiftUI
Implementing view
In order to meet previously defined requirements, custom view needs to support generics that match Enumeration model defined in previous step.
FilterRowView:
import SwiftUI struct FilterRowView<T>: View where T: RawRepresentable, T: CaseIterable, T: Identifiable, T.AllCases == [T], T.RawValue == String { @State private var selectedFilter: T = T.allCases[0] var body: some View { ScrollView(.horizontal, showsIndicators: false) { LazyHStack(spacing: 15) { ForEach(T.allCases) { filter in Button(action: { withAnimation(Animation.spring().speed(1.5)) { selectedFilter = filter } }) { Text(filter.rawValue.capitalized) .font(.subheadline) } .buttonStyle(FilterButtonStyle(isSelected: selectedFilter == filter)) } } } .frame(height: 40) } } As you can see, view is using custom ButtonStyle to mimic YouTube-like design.
FilterButtonStyle:
struct FilterButtonStyle: ButtonStyle { let isSelected: Bool func makeBody (configuration: Self.Configuration) -> some View { configuration.label .foregroundColor( isSelected ? .white : .black ) .padding() .frame(maxWidth: .infinity, maxHeight: 30) .background( isSelected ? .black : .white ) .cornerRadius(24) .overlay( RoundedRectangle(cornerRadius: 24) .stroke(isSelected ? .white : .black, lineWidth: 0.3) ) } } FilterRowView should now look something like this:

It's horizontally scrollable view with buttons, each with its own state, and selected button has different color to the others.
State hoisting
As you probably noticed yourself, FilterRowView doesn't really do anything so we need to add the ability to filter data, but the view must be stateless, as stated in the Requirements section.
How to do that? Using state hoisting pattern. What is that? Let's explain it.
State hoisting is a well-known pattern for developing React applications, and as of recently, Google is recommending using it when developing Jetpack Compose applications.
State hoisting is a pattern of moving state to a caller to make view stateless.
In practice that means using higher order functions, which in Swift terms, means using closures.
To start using state hoisting pattern in FilterRowView, we only need two more lines of code. One line for new parameter which will accept closure and one line to provide generic type to closure.
Updated FilterRowView:
import SwiftUI struct FilterRowView<T>: View where T: RawRepresentable, T: CaseIterable, T: Identifiable, T.AllCases == [T], T.RawValue == String { let block: (T) -> Void @State private var selectedFilter: T = T.allCases[0] var body: some View { ScrollView(.horizontal, showsIndicators: false) { LazyHStack(spacing: 15) { ForEach(T.allCases) { filter in Button(action: { withAnimation(Animation.spring().speed(1.5)) { selectedFilter = filter } block(filter) }) { Text(filter.rawValue.capitalized) .font(.subheadline) } .buttonStyle(FilterButtonStyle(isSelected: selectedFilter == filter)) } } } .frame(height: 40) } } With this, FilterRowView is completely stateless and to do anything useful, it relies on its caller.
To use this in your application, you would call FilterRowView view with something like this:
FilterRowView<CarType>(block: { type in viewModel.filterCars(by: type) }) Conclusion
Thank you for reading and I hope this article was useful to you! In conclusion, this article went over how to implement custom YouTube-like filtering in SwiftUI using enumerations, generics, and closures.
If you like my content and find it useful, please consider following me. If you are feeling extra generous, please consider buying me a coffee.
Connect with me on LinkedIn.
How to Design a List Using Swiftui
Source: https://kevin-furjan.hashnode.dev/implement-youtube-like-filtering-in-swiftui
0 Response to "How to Design a List Using Swiftui"
Enregistrer un commentaire